
Here is part 4 in the series of instructions for setting up a basic Shopify website with themes at the end
Module 5: Theme
From the very beginning, the ultimate purpose of posting your products, articles, blogs, menus, etc. is to make them appear on the homepage of your website. That job is to customize the theme/interface of the website. Shopify has 2 types of themes:
Free: currently there are more than 10 free themes by Shopify, you can check it out here!
Paid Themes: you can buy premium themes on Shopify Theme store or at Themeforest!
If you use theme purchased from elsewhere, you can choose “Upload theme” to use. In case you want to buy a good theme/template to use, you can choose “Visit Theme Store” and explore Shopify’s theme store for yourself.
In this post, I will use a free theme to install and customize. To do this, simply select “Explore free themes”.
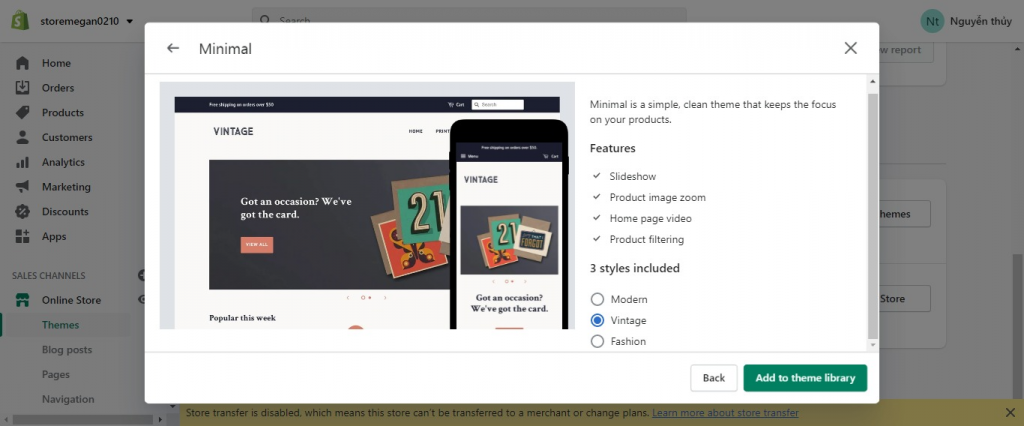
There will be about 10 free themes for you to choose from, you can choose according to your preferences or the style you want. I choose a template that is quite popular and easy to customize, “Minimal”.
Your default theme is still Debut, you need to select the “Minimal” > Actions > Publish theme to set Minimal as your default theme.
Now Minimal is your default theme. To customize, you choose “Customize”.
In the Customize Theme interface is divided into 2 parts, on the left are Sections and Theme settings, where you customize the items that will appear on your homepage.

Just to the right is the actual version of the homepage, which changes in real-time each time you make any edits. Remember to click “Save” after each edit.
In the top right there are 3 small icons, which are 3 sizes that will display your website. You can click to see how your homepage will look on different devices like smartphones, tablets, desktop
Sections
The content that you customize to appear on the homepage, including:
- Header: is the content of the top of the page, where the logo, menu, and shopping cart appear
- Body: the body of the page, where you can add content such as slideshows, banners, collections, products, blogs, articles, videos
- Footer: footer, usually menu, short article, newsletter, copyright
.You cannot delete Header and Footer, only customize and edit. As for the Body part, you can add as many sections as you want, and you can delete it.
In the Header section, you can see the options
- Show search bar: you can choose to show or hide the search bar
- Logo: you will upload the logo to display on the homepage, recommended size 450×200 pixels. Note: your logo should be transparent and .png
In the Main menu section, you can edit to select the menu that will appear on the homepage. The default is the main menu that you edited in the previous Module. You can change to another menu if you want, but you have to create that menu in advance.
You can choose some of the options like:
- Center main menu below logo: Logo in the middle and menu right below
- Left-align logo: Logo is on the left
- Announcement bar: notification bar, you can choose to show or hide this bar, and write what you want
You can select “Add section” to add content.
There are dozens of section types you can choose from, usually, the structure of a website will start with a slideshow or image with text.
You can choose:
- Heading: the title of the section
- Collection: select the collection you want to appear on this section
- Products per row: number of products per row
- Rows: the number of product rows you want to display
- Show “Sale” circle: display the icon for Sale
Footer is the last part of the page, usually displaying information such as customer care, store address, social network links, blog posts, newsletter subscriptions, …
You can customize the sections for the footer depending on your needs. As for the Social icons section, you need to go to the Theme Settings section right below to edit.
Theme Settings
If you edit and organize content with Sections, then Theme settings are where you will edit specifications like colors, fonts, favicon
Special customization
When you click on the Shop/Catalog item on the right, or the link to the collections, on the left will appear a special custom section called Collection pages.
At the Collection page, where the products of the collection/collection will be displayed, you can choose to display or not display some parameters such as Vendor, Sale icon, filter products by tag
When you click on any product, there will be a special section called Product pages.
You have quite a few options such as Show quantity options, Image zoom/zoom, Thumbnail image position (in case there are many product photos)
So we have completed the series of basic Shopify store setup series, wish you success in building your own Shopify website.