Contents
Images on a web page are also a very important factor that contributes to creating accents and increasing the user experience on your website. With Shopify, displaying images is a very simple job. In this article, I will show you how to get images with liquid.
To get photos with liquid in Shopify, you can follow these instructions:
Step 1: Log in to your Admin Panel.
Step 2: In Online Store, Choose Themes, Click Edit code
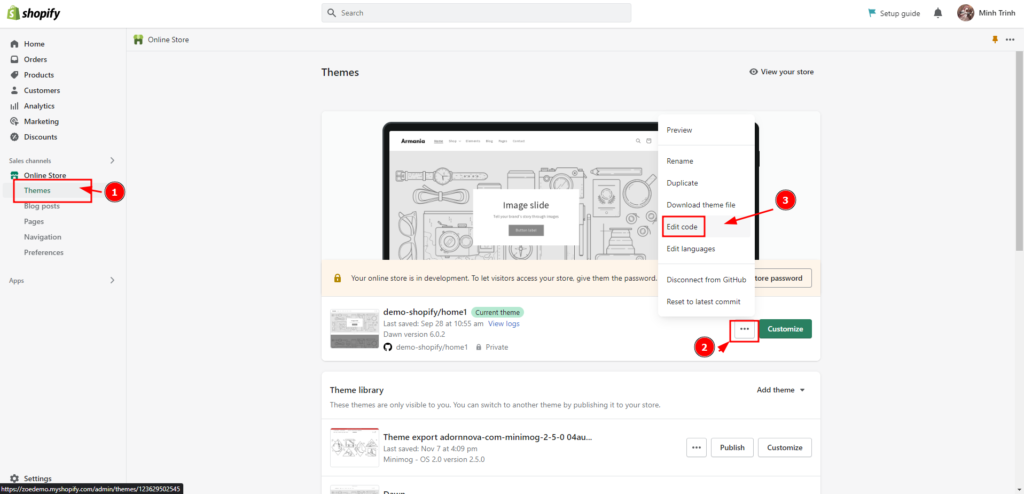
Step 3: Open the file to which you want to add an image or background. Add the following code:
For image:
{{ [image called by liquid] | asset_url | img_tag: 'Logo' }}Example:
{{ section.settings.image | asset_url | img_tag: 'Logo' }}{{ block.settings.image | asset_url | img_tag: 'Logo' }}For background:
{{ [image called by liquid] | img_url: '[image size]' }}Note: Image size can be one of the following values:
- image size = [image width]x
- image size = x[image height]
- image size = [image width]x[image height]
- image size = master
Example:
{{ block.settings.image | img_url: '1920x' }}{{ block.settings.image | img_url: 'x500' }}{{ block.settings.image | img_url: 'master' }}Above is a guide for you to add an image or background using Liquid Shopify. Hope to be of help to you.
Follow us for more knowledge-sharing articles.
In ThemeForest: Alotheme