
Contents
If you are intending to sell in international markets then tax is inevitable. Taxes have never been so fun and calculating, collecting and paying taxes requires a lot of calculation, knowledge of the law, and the more countries you sell, the more confusing. . In this article, I will guide you on how to set up value added tax (VAT) in Magento 2.
What is Value Added Tax (VAT)?
Value Added Tax (VAT) is a tax imposed on different goods based on the production or distribution of the products, materials or services that the store is selling. It is usually calculated as a percentage of the selling price of the product. Magento 2 supports us to configure, setting up VAT from the admin panel is very easy, it also allows to add more than one VAT.
Steps to configure and set up VAT in Magento 2
Step 1: Fill in the Customer Tax Classes
First we need to fill in the Customer Tax Classes, log in to the Magento 2 admin page and select STORES -> Tax Zones and Rates. Check that Retail Customer Tax is available, if not, choose Add New to create a new one.
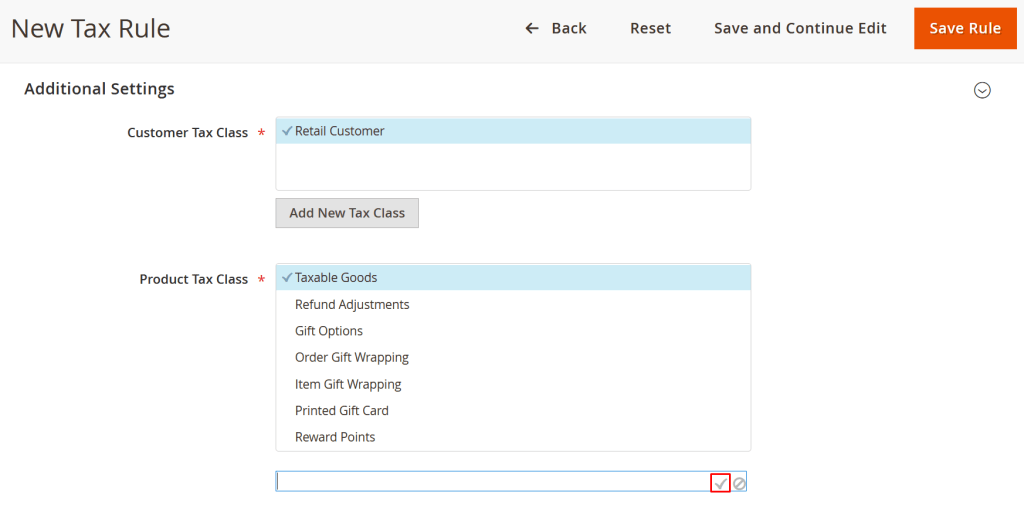
Step 2: Fill out the Product Tax Classes
Select STORES -> Tax Rules -> Add New Tax Rule.
Scroll down to expand Additional Settings and select Add New Tax Class.
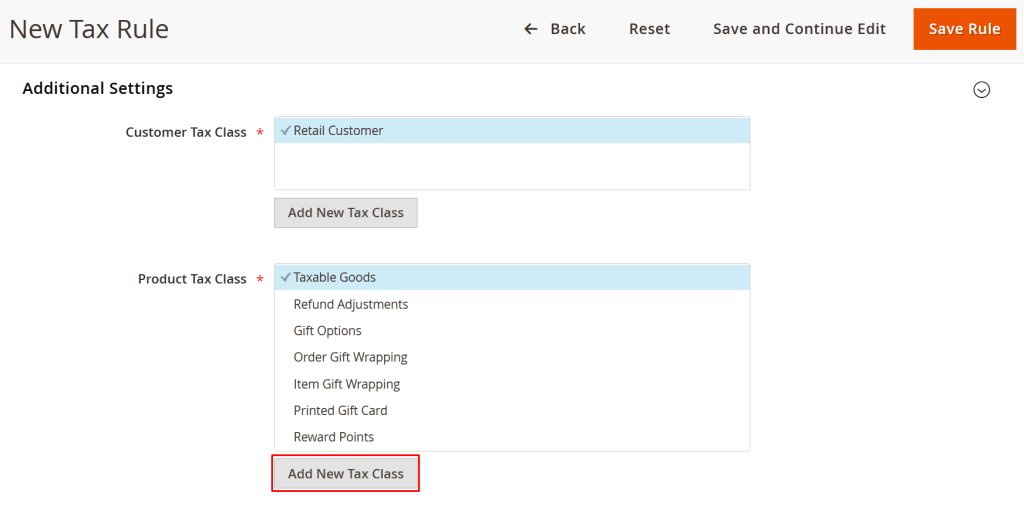
Add three classes of VAT Standard, VAT Reduced, and VAT Zero to the Product Tax Class list by filling in and clicking the tick each time you add a new one.
Step 3: Enter Tax Zones and Rates
Select STORES -> Tax Zones and Rates -> Add New Tax Rate.
Enter full information
Tax Identifier: Tax identification number.
Zip / Post is Range: Add range.
Zip / Post Code: Postal code.
State: State.
Country: Country.
Rate Percent: Percentage.
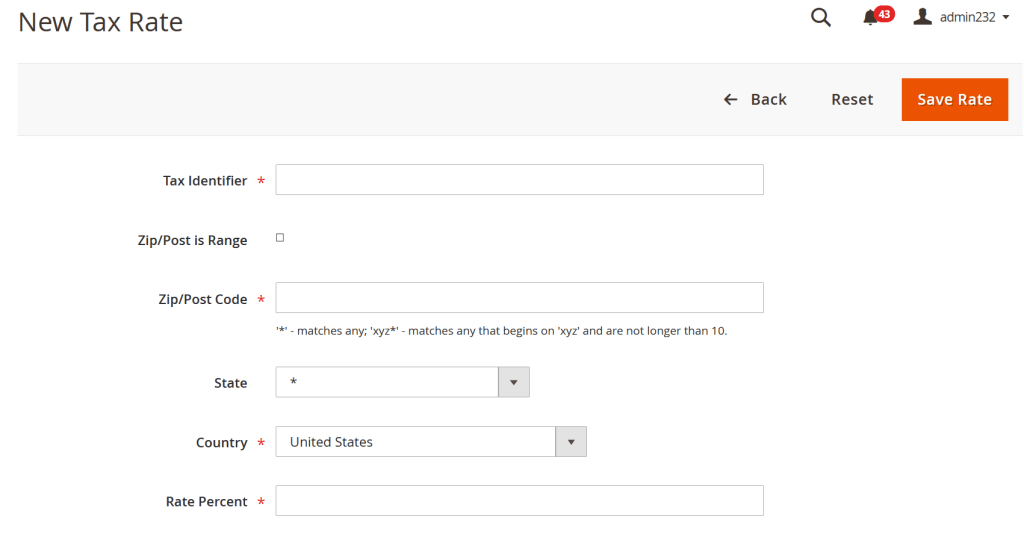
Then select Save Rate to save.
Step 4: Fill out Tax Rules
Select STORES -> Tax Rules -> Add New Tax Rule. Complete the information and select the Tax Rate created above. Click Save Rule to save it.
Step 5: Deploy taxes on products
Access CATALOG -> Products to find products that need more tax, select Edit.
Scroll down to the Tax Class section and select the appropriate tax that you want to apply to that product, then select Save
Hope this guide help you