
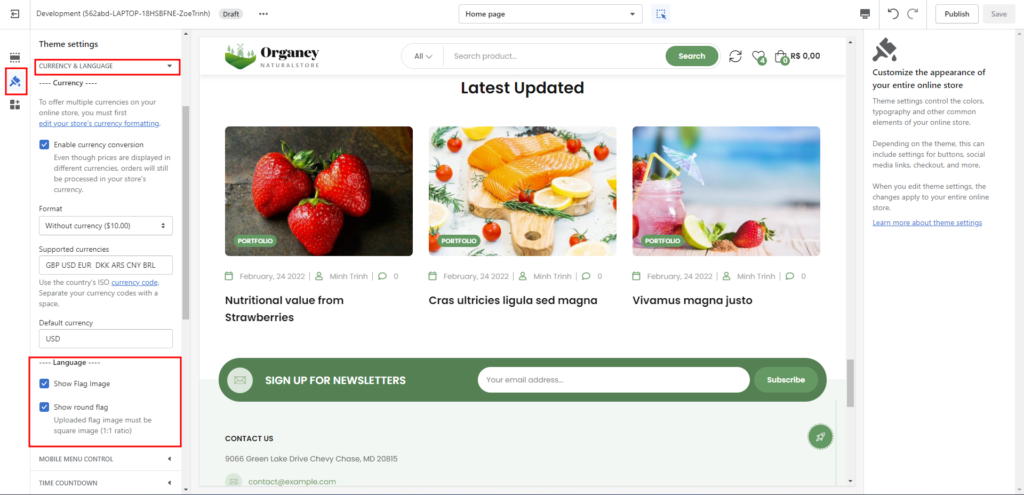
When building your online store, if your aim is toward a multilingual store, then language recognition will become easier when there is an image of the country’s flag on it. That helps increase the customer experience on your website. In this article, I will show you how to add a flag image to your Shopify store.
1. Use default flags:
If you don’t use a personalized flag image for your site, we already have a default flag image based on Shopify’s built-in flag image. In this case, you don’t need to do anything. Your site will always have this flag image if you choose the flag image display option in our settings. You can see the instructions for configuring flags here.
2. Use your own flag
Conversely, if you want to upload your own styled flag image, you can follow these instructions.
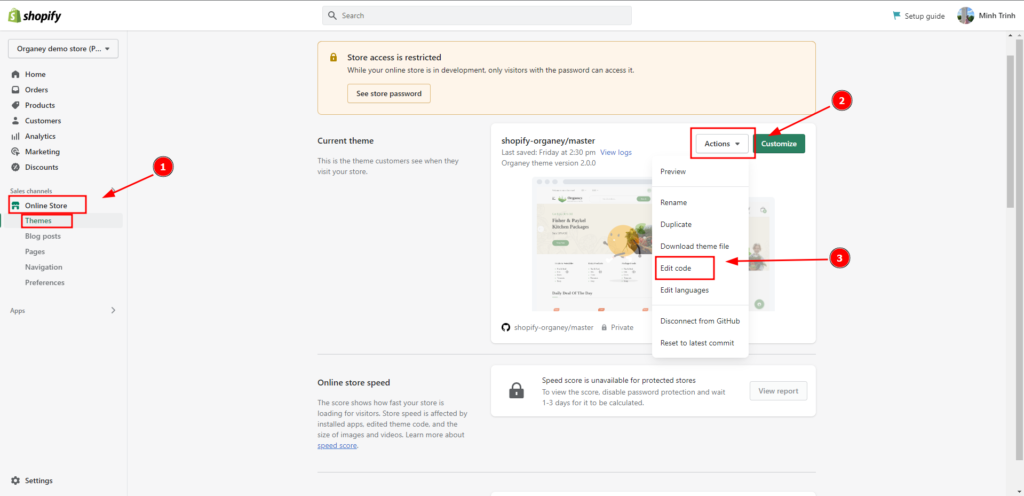
Step 1: Login Admin Panel:
Log in to your store’s Admin Panel -> Click on Online Store (Theme) -> In the Theme you are public -> Click on Action -> Select Edit code.
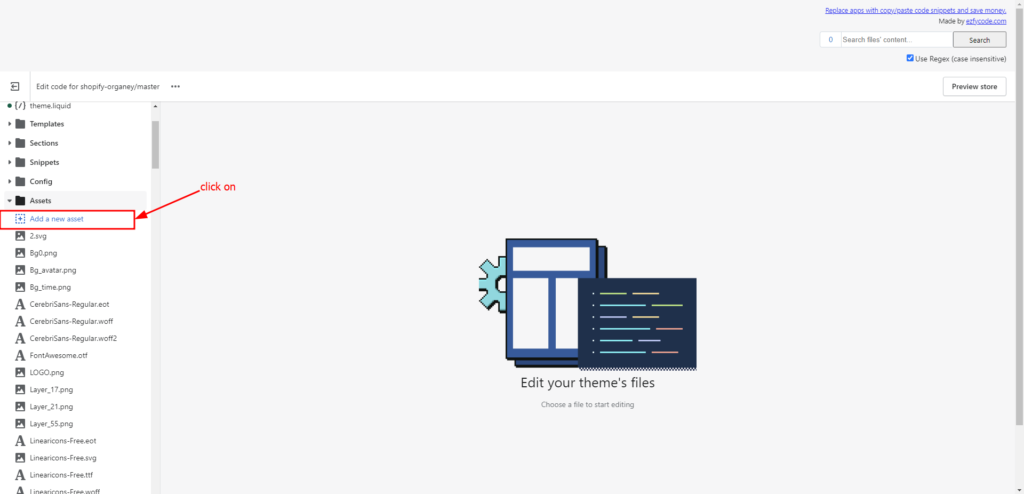
Step 2: Upload flag image:
In the Assets folder -> Click on Add a new asset -> Choose your flag image file to upload.
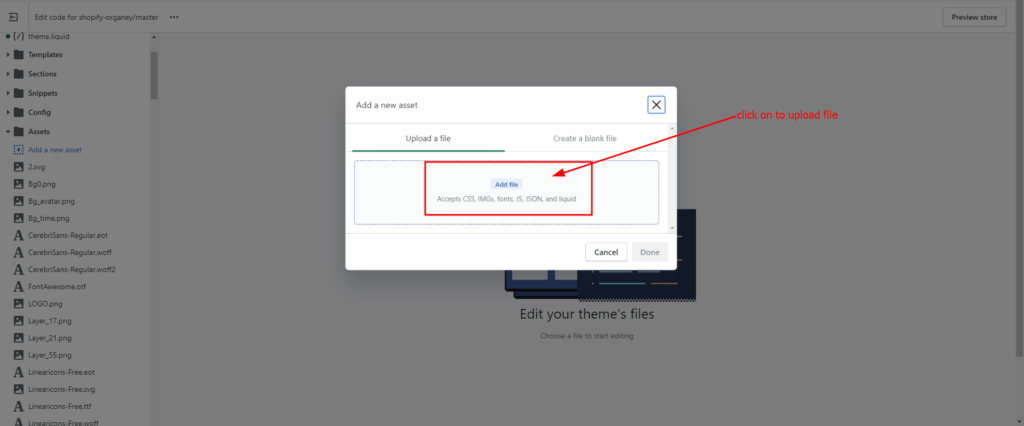
Note: The name of the photo must be the country’s flag code.