
WYSIWYG stands for What You See is What You Get, is a website editor to help change and manage content. When using Magento, you may have seen the ‘WYSIWYG’ button in many places and when you click on it, the box will appear for you to text. Magento has also come up with a configuration for the WYSIWYG editor. In this article, I will show you how to configure WYSIWYG in Magento 2.
Step to configure WYSIWYG editor
Step 1: Login to the Magento 2 admin page, select STORES -> Configuration -> GENERAL -> Content Management -> WYSIWYG Options.
Step 2: Customize WYSIWYG as desired, specifically
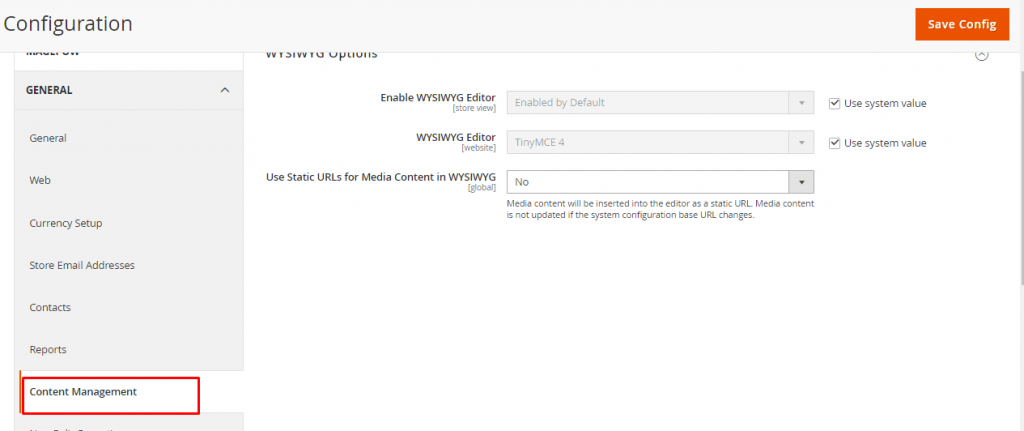
Enable WYSIWYG Editor: Select Enabled by Default to enable it by default, there are also Disabled by Default and Disabled Completely.
WYSIWYG Editor: Default choose TinyMCE4
Use Static URLs for Media Content in WYSIWYG: This should be set to No because when you insert media into the WYSIWYG editor, it will automatically get the base URL that you set up during your Magento installation.
Base URL: Your current domain URL.
Save and click on the button cache management to cache and flush
Hope this guide help you!